สำหรับวันนี้มาอยู่กับหัวข้อสำหรับมือใหม่กำลังหัดเขียน NestJS ที่อ่าน Docs แล้วเจอคำว่า “Pipes” และ “Interceptors” ผ่านตากันมาบ้าง แต่ยังไม่เข้าใจว่ามันคืออะไร และใช้ยังไง วันนี้แอดจะพาไปดูกันผ่าน workshop ง่าย ๆ ทำตามแล้วเห็นภาพไปด้วยเลย
ก่อนอื่นต้องบอกกว่าทั้งคู่ทำคนละหน้าที่กัน แต่ในบทความนี้แอดจับมาอธิบายทั้งคู่ให้เห็นภาพเพราะทั้งคู่ก็ต่างเป็นกลไลที่สำคัญที่ทำให้ NestJS เป็น Framework ที่น่าสนใจ
Pipes คืออะไร?
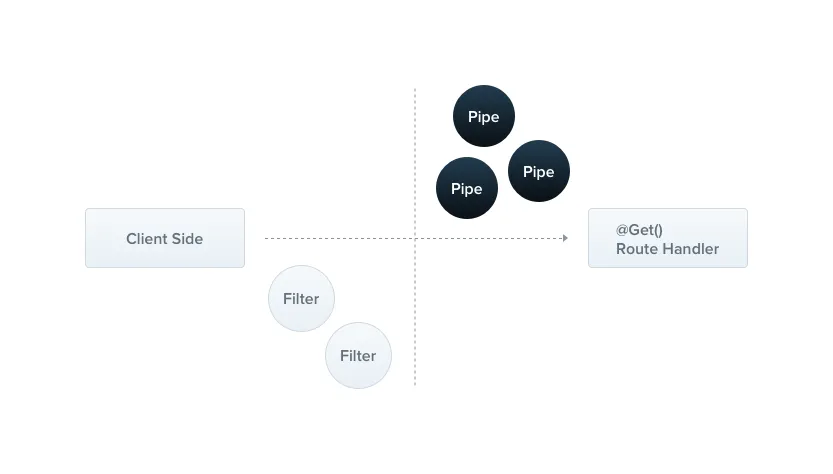
สำหรับ Pipes ใน NestJS เป็นเหมือนตัวช่วยกรอง (Filter) และ แปลงข้อมูฃ ที่ถูกส่งเข้ามที่ Controller ให้นึกภาพว่า Pipes ก็เหมือนเครื่องกรองน้ำที่จะทำให้น้ำ (ข้อมูล) ที่จะถูกส่งต่อไป ผ่านการกรองพวกสิ่งสกปรก หรือ เปลี่ยนน้ำ (ข้อมูล) ให้อยู่ในรูปแบบแบบที่เราต้องการก่อนเข้าสู่ระบบ

Interceptors คืออะไร?
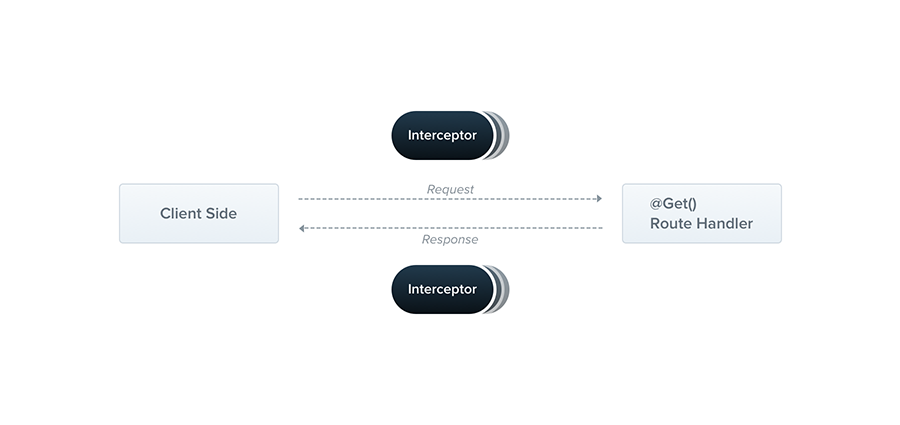
ในโลกของ NestJS ตัว Interceptor เป็นตัวที่คั่นกลางระหว่างการทำงานของ Request และ Response โดยมันจะทำงานก่อนหรือหลังฟังก์ชันของ Controller เราสามารถเอาไปทำ log ข้อมูลก่อน-หลังรันโค้ด, การจัดการข้อมูล response ด้วย map() แถมยัง ใช้ร่วมกับ RxJS operators ได้อย่างหลากหลาย ไม่ว่าจะเป็น tap(), map() หรือ catchError()
ตัวอย่างการใช้งาน Pipes และ Interceptors
สิ่งที่ต้องเตรียม:
- มี Node.js และ npm ติดตั้งบนเครื่องแล้ว
- มี Nest CLI ติดตั้งแล้ว (npm install -g @nestjs/cli) ถ้ายังไม่มีให้ติดตั้งก่อน
ขั้นตอนที่ 1: สร้างโปรเจกต์ NestJS ใหม่
nest new my-nest-workshop
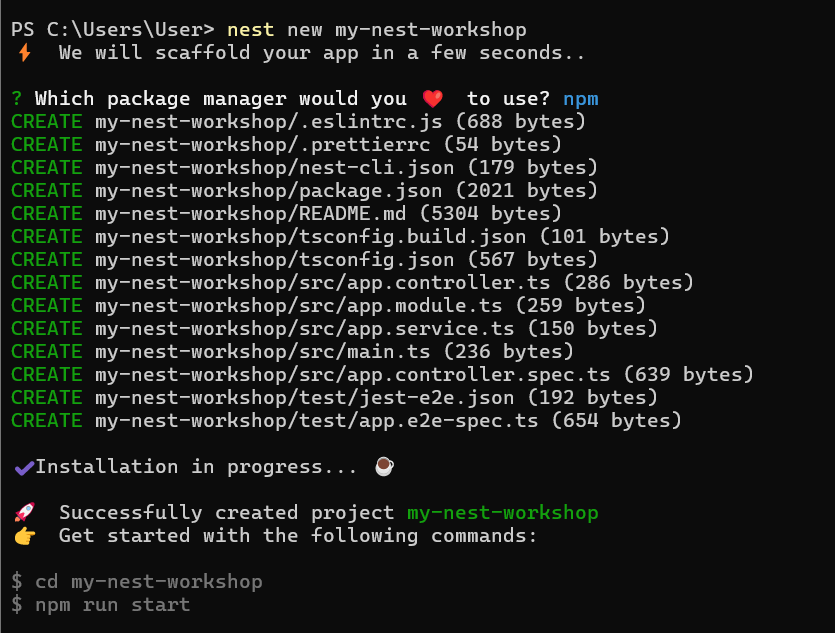
รอสักแปป Nest CLI จะสร้างโปรเจกต์ให้ จากนั้นเข้าไปในโฟลเดอร์โปรเจกต์
cd my-nest-workshop
รันเซิร์ฟเวอร์ดู (ค่าเริ่มต้นจะรันที่พอร์ต 3000)
npm run start:dev
ตอนนี้เปิดเว็บเบราว์เซอร์แล้วเข้า http://localhost:3000 จะเห็นข้อความ “Hello World!” จาก AppController มาแล้ว
ขั้นตอนที่ 2: สร้าง Pipes
เราจะสร้าง Pipes ขึ้นมาเพื่อเช็คค่าที่ส่งมา ให้มันต้องเป็นตัวเลขเท่านั้น ถ้าไม่ใช่ก็ให้โยน Error ออกไป โดยให้เราสร้างไฟล์ validate-number.pipe.ts ในโฟลเดอร์ src
// src/validate-number.pipe.ts
import { PipeTransform, Injectable, BadRequestException } from '@nestjs/common';

@Injectable()
export class ValidateNumberPipe implements PipeTransform {
  transform(value: any) {
    const val = parseFloat(value);
    if (isNaN(val)) {
      throw new BadRequestException('ค่านี้ไม่ใช่ตัวเลข!');
    }
    return val;
  }
}
ขั้นตอนที่ 3: สร้าง Interceptor ของเรา
ต่อมาเราจะมาลองสร้าง Interceptor โดยตัวอย่างนี้เราจะเอามาสร้างตัววัดเวลาที่ Request ประมวลผลเพื่อดูว่าโค้ดเราใช้เวลารันนานแค่ไหน
โดยเราสร้างไฟล์ logging.interceptor.ts ในโฟลเดอร์ src
// src/logging.interceptor.ts
import { Injectable, NestInterceptor, ExecutionContext, CallHandler } from '@nestjs/common';
import { Observable } from 'rxjs';
import { tap } from 'rxjs/operators';

@Injectable()
export class LoggingInterceptor implements NestInterceptor {
  intercept(context: ExecutionContext, next: CallHandler): Observable<any> {
    const now = Date.now();
    return next.handle().pipe(
      tap(() => console.log(`ใช้เวลาในการประมวลผล: ${Date.now() - now}ms`)),
    );
  }
}
โดย Interceptors นี้จะแสดง log เวลาที่ใช้ในการประมวลผลทุกครั้งที่มีการเรียก Controller
ขั้นตอนที่ 4: สร้าง Controller
ต่อมาเราก็มาสร้าง Controller โดยตัวอย่างนี้จะกำหนดให้มีเส้น (Route) /math/:a/:b เพื่อรับค่าตัวเลข a และ b แล้วทำการบวกกัน โดยใช้ Pipes ตรวจสอบว่าเป็นตัวเลข และใช้ Interceptor จับเวลา (เริ่มเห็นภาพขึ้นมาแล้วมั้ยงับ)
สร้างไฟล์ math.controller.ts ในโฟลเดอร์ src
// src/math.controller.ts
import { Controller, Get, Param, UsePipes, UseInterceptors } from '@nestjs/common';
import { ValidateNumberPipe } from './validate-number.pipe';
import { LoggingInterceptor } from './logging.interceptor';

@Controller('math')
@UseInterceptors(LoggingInterceptor) // ใช้ Interceptor กับทั้ง Controller
export class MathController {
  @Get(':a/:b')
  @UsePipes(ValidateNumberPipe) // ใช้ Pipe กับ Endpoint นี้
  addNumbers(@Param('a', ValidateNumberPipe) a: number, @Param('b', ValidateNumberPipe) b: number) {
    return { result: a + b };
  }
}
- @UseInterceptors(LoggingInterceptor) แปะไว้ที่ระดับ Controller หมายความว่าทุก method ใน Controller นี้จะใช้ Interceptor ตัวนี้
- @UsePipes(ValidateNumberPipe) แปะไว้ที่ method นี้เพื่อบังคับให้ param :a และ :b ต้องผ่าน Pipe ก่อน ถ้าไม่ใช่ตัวเลขจะ Error ทันที
ขั้นตอนที่ 5: Register Controller ใหม่ใน app.module.ts
เปิดไฟล์ src/app.module.ts และเพิ่ม MathController เข้าไปใน imports หรือ controllers (ขึ้นอยู่กับ NestJS Version ถ้าเป็นเวอร์ชันใหม่ให้เพิ่มใน controllers ได้เลย)
import { Module } from '@nestjs/common';
import { AppController } from './app.controller';
import { AppService } from './app.service';
// Import Controller ใหม่
import { MathController } from './math.controller';

@Module({
  imports: [],
  controllers: [AppController, MathController], // เพิ่ม MathController
  providers: [AppService],
})
export class AppModule {}
เสร็จแล้วกด Save แล้วรันเซิร์ฟมาได้เลย npm run start:dev
ขั้นตอนที่ 6: ทดสอบ API
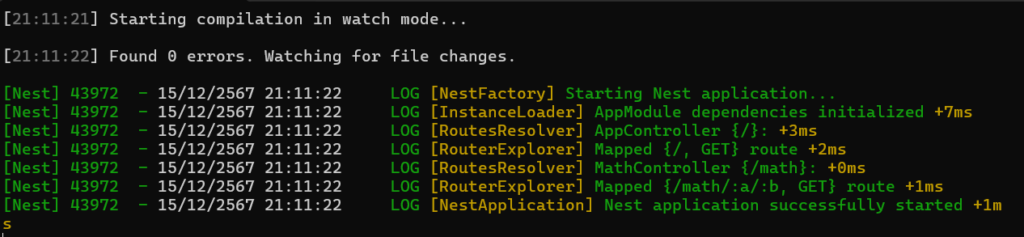
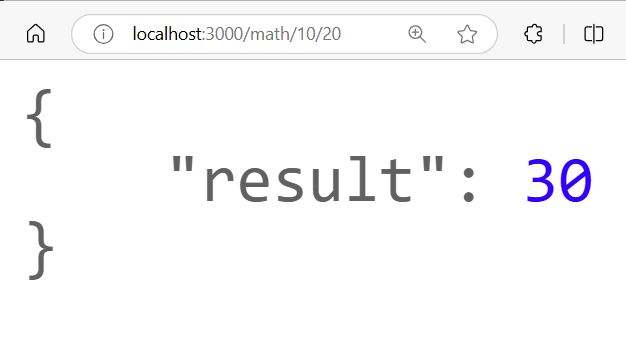
เราสามาถเปิดเบราว์เซอร์ หรือ Postman ก็ได้ ลองเรียก GET http://localhost:3000/math/10/20 เราก็จะเห็น Response ออกมาแบบภาพนี้
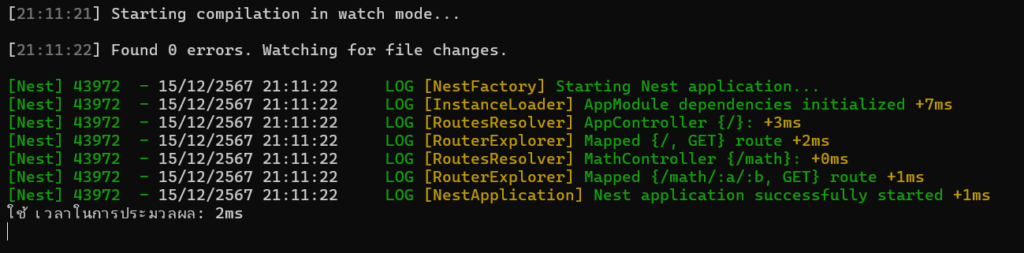
แล้วพอไปดูใน Terminal ที่รัน NestJS อยู่เราจะเห็นเวลาที่ใช้ในการประมวลผลของ Request นั้นมาเป็นหน่วย ms
แล้วถ้ากันมี user ทะลึ่ง (ที่ไม่น่าจะทำกัน) จากใส่ 10 เป็นคำว่า “ten” มาแบบนี้ http://localhost:3000/math/ten/20 คุณก็จะพับกบ พบกับ Error ดังนี้
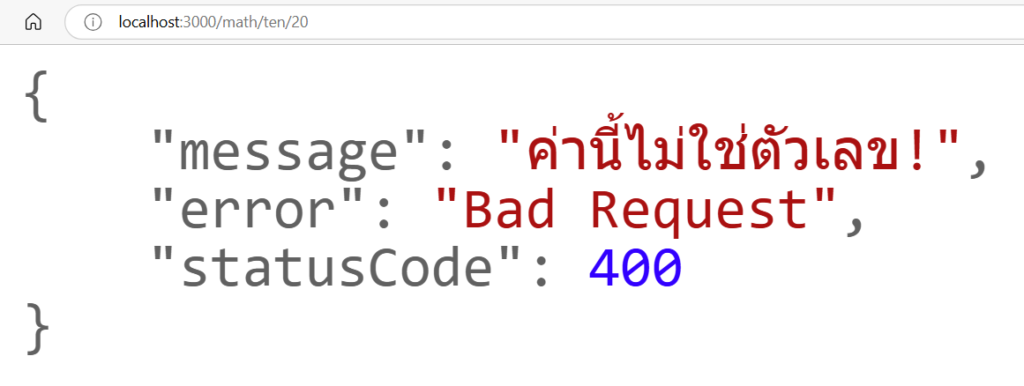
เพราะพี่ Pipes ของเราเจอว่ามันไม่ใช่ตัวเลข!
และนี่ก็จะเป็นตัวอย่างง่าย ๆ สำหรับการใช้งาน Pipes และ Interceptors ครับ แอดหวังว่าบทความนี้จะช่วยให้คนที่เริ่มหัดเขียน NestJS เข้าใจ Concept ของตัวนี้ได้ง่ายขึ้นนะครับ 🧡