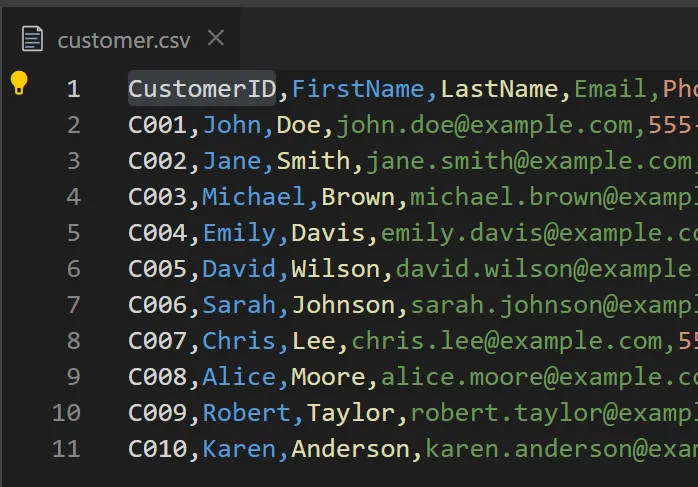
เนื่องจากไม่นานนี้แอดได้เขียนบทความเรื่อง “การสร้างข้อมูลปลอมใน Postman มาทดสอบ API” และเจอคำถามจากเพื่อน ๆ อยากให้สอนเรื่อง “การ Import Test data จาก Excel/CSV” วันนี้แอดเลยเอาตัวอย่างวิธีการ Import จากข้อมูลที่มีอยู่แล้ว เอามาทดสอบ API ด้วย Postman กัน โดยตัวอย่างในบทความนี้เราจะลองใช้ข้อมูลตัวอย่างลูกค้าในรูปแบบไฟล์ CSV ที่มีรายละเอียดดังนี้ ชื่อ, ที่อยู่, เบอร์โทรศัพท์, อีเมล, อายุ, เพศ และข้อมูลอื่น ๆ
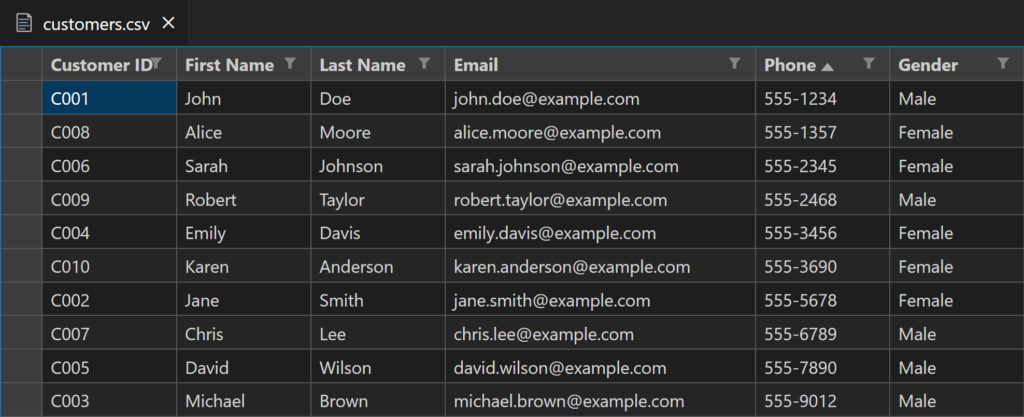
เมื่อเรามีข้อมูลตัวอย่างแล้ว เราจะดึงข้อมูลแต่ละแถวจาก CSV เพื่อส่งไปกับ Request ในแต่ละครั้ง ด้วยตัวแปรแบบ Dynamic โดยเราจะทดสอบข้อมูลนี้กับ API โดย API ตัวอย่างนี้เราจะใช้โค้ดนี้
const express = require('express');
const bodyParser = require('body-parser');
const app = express();
const PORT = 3000;

// Middleware
app.use(bodyParser.json());

// Mock Data (เก็บใน Array)
let customers = [];

// Create - เพิ่มลูกค้าใหม่
app.post('/customers', (req, res) => {
    const customer = req.body;
    customers.push(customer);
    res.status(201).json({
        message: 'Customer created successfully',
        customer: customer,
    });
});

// Read - ดูข้อมูลลูกค้าทั้งหมด
app.get('/customers', (req, res) => {
    res.status(200).json(customers);
});

// Read - ดูข้อมูลลูกค้าตาม ID
app.get('/customers/:id', (req, res) => {
    const customerId = req.params.id;
    const customer = customers.find(c => c.customer_id === customerId);
    if (!customer) {
        return res.status(404).json({ message: 'Customer not found' });
    }
    res.status(200).json(customer);
});

// Update - แก้ไขข้อมูลลูกค้า
app.put('/customers/:id', (req, res) => {
    const customerId = req.params.id;
    const index = customers.findIndex(c => c.customer_id === customerId);
    if (index === -1) {
        return res.status(404).json({ message: 'Customer not found' });
    }
    customers[index] = { ...customers[index], ...req.body };
    res.status(200).json({
        message: 'Customer updated successfully',
        customer: customers[index],
    });
});

// Delete - ลบลูกค้า
app.delete('/customers/:id', (req, res) => {
    const customerId = req.params.id;
    const index = customers.findIndex(c => c.customer_id === customerId);
    if (index === -1) {
        return res.status(404).json({ message: 'Customer not found' });
    }
    const deletedCustomer = customers.splice(index, 1);
    res.status(200).json({
        message: 'Customer deleted successfully',
        customer: deletedCustomer,
    });
});

// Start Server
app.listen(PORT, () => {
    console.log(`Server running on http://localhost:${PORT}`);
});เมื่อเรารันโค้ด API พร้อมที่จะทดสอบแล้ว
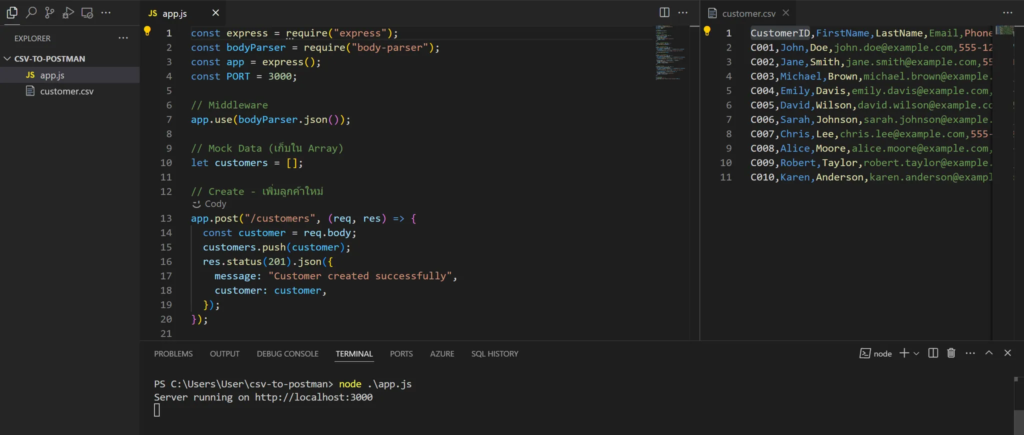
เราก็สามารถเปิด Postman สร้าง Request ลงใน Collection แล้วตอนที่เราแนบข้อมูลเราจะต้องไปที่ Body → Raw → เลือกเป็น JSON แล้วใช้ตัวอย่างข้อมูลที่เราปั้นขึ้นมา โดยการใช้ตัวแปรแบบ Dynamic ที่มีชื่อตัวแปรอยู่ในสัญลักษณ์ {{ชื่อตัวแปร}}
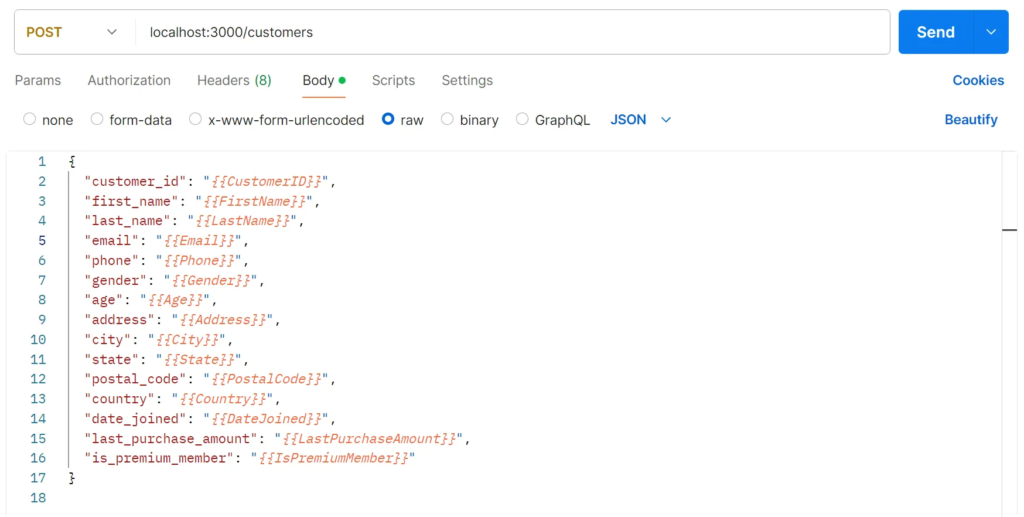
{
  "customer_id": "{{CustomerID}}",
  "first_name": "{{FirstName}}",
  "last_name": "{{LastName}}",
  "email": "{{Email}}",
  "phone": "{{Phone}}",
  "gender": "{{Gender}}",
  "age": "{{Age}}",
  "address": "{{Address}}",
  "city": "{{City}}",
  "state": "{{State}}",
  "postal_code": "{{PostalCode}}",
  "country": "{{Country}}",
  "date_joined": "{{DateJoined}}",
  "last_purchase_amount": "{{LastPurchaseAmount}}",
  "is_premium_member": "{{IsPremiumMember}}"
}ตอนที่เราจะเอาค่าจากไฟล์ส่งไป เราจะต้องไปที่หน้า Collection และคลิกปุ่ม Run

เพื่อเข้าสู่หน้า Collection Runner
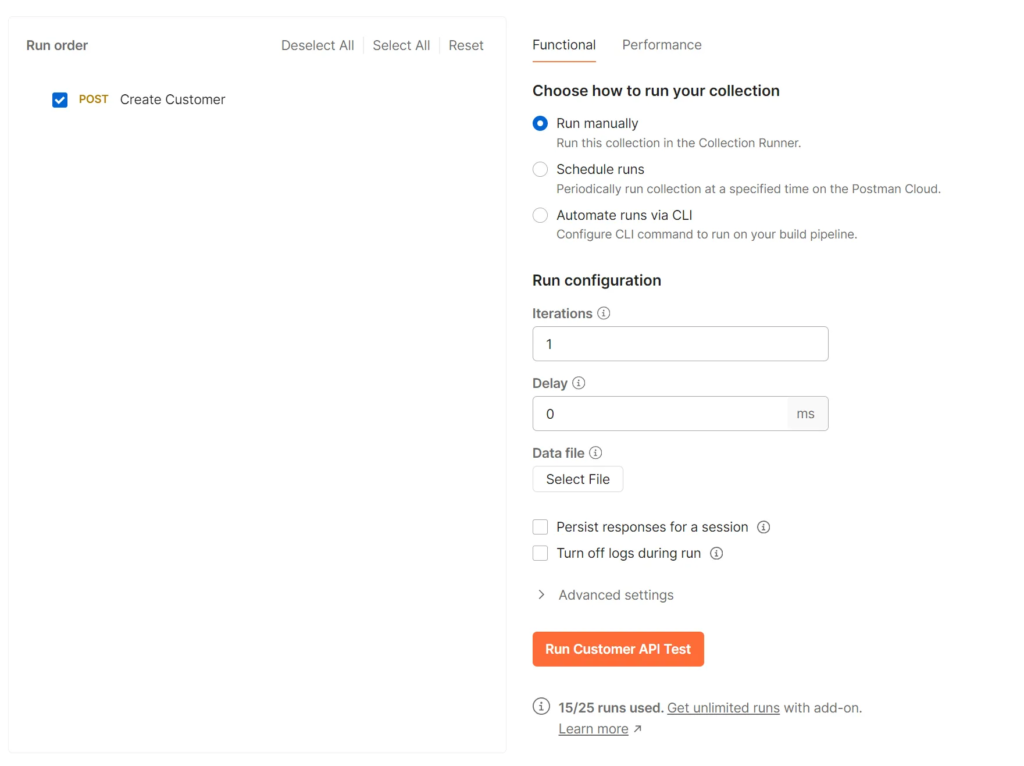
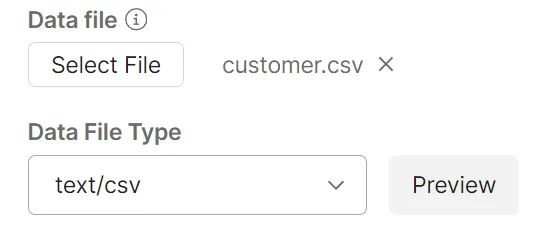
ส่วนที่เราต้องโฟกัสจะอยู่ที่ Data File ให้คลิกเลือก Choose File และเลือกไฟล์ที่เราต้องการเอาเข้ามาใช้ เช่น customers.csv
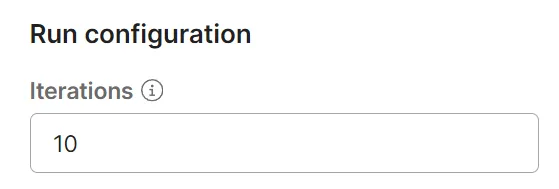
กำหนด Iterations เท่ากับจำนวนแถวในไฟล์ CSV
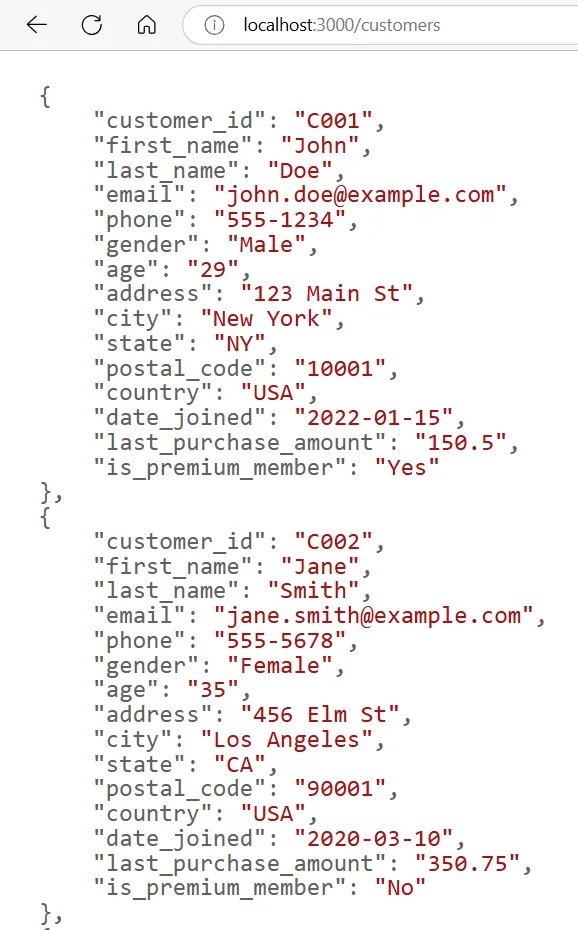
คลิก Run Collection เพื่อเริ่มต้นการทดสอบ เสร็จแล้วเราก็จะเห็นได้ว่าข้อมูลของเราก็จะถูกเพิ่มเข้าไปใน API เรียบร้อยแล้ว
และนี่ก็จะเป็นอีกหนึ่งเทคนิคการทดสอบ API แบบ Batch หรือ Iterative Testing ที่เป็นการทดสอบ API เดียวกันหลาย ๆ ครั้ง แต่จะมีการใช้ข้อมูลที่แตกต่างกันไปในแต่ละครั้ง เช่น Import ข้อมูลลูกค้า (CSV) ที่มีรายละเอียด 100 รายการ เพื่อทดสอบ API ในการสร้างบัญชีผู้ใช้ใหม่ทีละหลาย ๆ บัญชี หรือ ทดสอบ API การคำนวณราคาสินค้า โดยส่งพารามิเตอร์ (เช่น รหัสสินค้า ปริมาณ ส่วนลด) ที่แตกต่างกันในแต่ละ Iteration
ซึ่งเราจะเห็นได้ว่าการทำแบบนี้ช่วยให้เราประหยัดเวลา ลดการใส่ข้อมูลเอง ลดข้อผิดพลาดที่อาจจะเกิดขึ้น แถมยังสะดวกเวลาใช้งานร่วมกับคนอื่น ๆ ในทีมอีกด้วย 🚀