สารจากผู้เขียน
วันนี้ผมจะพาทุกคนมาอัปเกรดนาฬิกาเดิมจากงานครั้งที่แล้วของเราให้เจ๋งขึ้นกว่าเดิม !!
วันนี้ผมจะพาทุกคนมาอัปเกรดนาฬิกาเดิมจากงานครั้งที่แล้วของเราให้เจ๋งขึ้นกว่าเดิม !!

 เขียนโดย
Chairawit Iamkhajornchai
Internship @ borntoDev
บทความนี้ตีพิมพ์ และ เผยแพร่เมื่อ 24 กรกฎาคม 2566
จากครั้งแรกสุดเลยที่เราได้พาทำเรื่อง Circle Timer กันไป…ครั้งนี้เราจะมาอัปเกรด Circle Timer ของเรากันโดยให้สามารถทำงานได้ 3 Phase ได้แก่ Work → Short Break → Long Break จะเป็นยังไงไปดูกัน🌟
const Timer = ({ onReset }) => {
  const [phase, setPhase] = useState('Work'); // Initial phase is work
  const [isRunning, setIsRunning] = useState(false);
  const [seconds, setSeconds] = useState(25 * 60); // Set initial time to 25 minutes (work phase)
  const phases = [
    { name: 'Work', duration: 25 * 60 },
    { name: 'Short Break', duration: 5 * 60 },
    { name: 'Long Break', duration: 15 * 60 },
  ];
ประกาศสร้าง Phase ขึ้นมาด้วยกัน 3 ตัวได้แก่ Work, Short Break, Long Break โดยแบ่งเวลาเป็นนาที
useEffect(() => {
    let interval = null;

    if (isRunning && seconds > 0) {
      interval = setInterval(() => {
        setSeconds((prevSeconds) => prevSeconds - 1);
      }, 1000);
    } else {
      clearInterval(interval);
    }

    return () => clearInterval(interval);
  }, [isRunning, seconds]);

  useEffect(() => {
    if (phase === 'Long Break') {
      setPhase('Long Break');
    }
  }, [phase]);

  const formatTime = (time) => {
    const minutes = Math.floor(time / 60);
    const seconds = time % 60;

    return `${minutes}:${seconds.toString().padStart(2, '0')}`;
  };
ฟังก์ชันการทำงานพิ้นฐานของ Timer ตามแบบปกติเลยครับที่เคยทำไว้จากครั้งก่อน
const handleStartStop = () => {
    setIsRunning(!isRunning);
  };

  const handleReset = () => {
    setPhase('Work'); // Reset phase to work
    setSeconds(25 * 60); // Reset time to 25 minutes
    setIsRunning(false);
    onReset(); // Call the onReset function passed from the parent component
  };

  const handleNextPhase = () => {
    if (phase === 'Restart') {
      setPhase('Work');
      setSeconds(25 * 60);
    } else {
      const currentPhaseIndex = phases.findIndex((p) => p.name === phase);
      const nextPhaseIndex = (currentPhaseIndex + 1) % phases.length;
      const nextPhase = phases[nextPhaseIndex];

      setPhase(nextPhase.name);
      setSeconds(nextPhase.duration);
    }
    setIsRunning(false);
    onReset(); // Call the onReset function passed from the parent component
  };
ฟังก์ชันหยุดและรีเซ็ต Timer
ฟังก์ชันสำหรับควบคุม Phase การทำงานถัดไปของ Timer เมื่อกดปุ่ม “Next Phase แล้วจะทำการเปลี่ยนไป Phase ถัดไป
return (
    <View style={styles.container}>
      <View style={styles.circle}>
        <Text style={styles.timerText}>{formatTime(seconds)}</Text>
        <Text style={styles.phaseText}>{phase}</Text>
    </View>
    <View style={styles.buttonContainer}>
      <TouchableOpacity
        style={[styles.button, isRunning ? styles.stopButtonRed : styles.startButtonGreen]}
        onPress={handleStartStop}
      >
        <Text style={styles.buttonText}>{isRunning ? 'Stop' : 'Start'}</Text>
      </TouchableOpacity>
      <TouchableOpacity style={styles.button} onPress={handleReset}>
        <Text style={styles.buttonText}>Reset</Text>
      </TouchableOpacity>
      <TouchableOpacity style={styles.button} onPress={handleNextPhase}>
        <Text style={styles.buttonText}>
           {phase === 'Restart' ? 'Restart ' : 'Next Phase'}
        </Text>
      </TouchableOpacity>
    </View>
  </View>
 );
};
แสดง Circle Timer ของเราโดยเพิ่มส่วน Phase ขึ้นมาที่จะมีชื่อ Phase บอกใต้เวลาและปุ่ม “Next Phase” นอกนั้นจะเหมือนเดิมเลยและก็ปิดท้ายด้วย Styles ตกแต่งซึ่งส่วนนี้ก็แล้วแต่เราจะตกแต่งเลยนะโค้ดทั้งหมดก็จะหน้าตาประมาณนี้
import React, { useState, useEffect } from 'react';
import { View, StyleSheet, Text, TouchableOpacity } from 'react-native';

const Timer = ({ onReset }) => {
  const [phase, setPhase] = useState('Work'); // Initial phase is work
  const [isRunning, setIsRunning] = useState(false);
  const [seconds, setSeconds] = useState(25 * 60); // Set initial time to 25 minutes (work phase)
  const phases = [
    { name: 'Work', duration: 25 * 60 },
    { name: 'Short Break', duration: 5 * 60 },
    { name: 'Long Break', duration: 15 * 60 },
  ];

  useEffect(() => {
    let interval = null;

    if (isRunning && seconds > 0) {
      interval = setInterval(() => {
        setSeconds((prevSeconds) => prevSeconds - 1);
      }, 1000);
    } else {
      clearInterval(interval);
    }

    return () => clearInterval(interval);
  }, [isRunning, seconds]);

  useEffect(() => {
    if (phase === 'Long Break') {
      setPhase('Long Break');
    }
  }, [phase]);

  const formatTime = (time) => {
    const minutes = Math.floor(time / 60);
    const seconds = time % 60;

    return `${minutes}:${seconds.toString().padStart(2, '0')}`;
  };

  const handleStartStop = () => {
    setIsRunning(!isRunning);
  };

  const handleReset = () => {
    setPhase('Work'); // Reset phase to work
    setSeconds(25 * 60); // Reset time to 25 minutes
    setIsRunning(false);
    onReset(); // Call the onReset function passed from the parent component
  };

  const handleNextPhase = () => {
    if (phase === 'Restart') {
      setPhase('Work');
      setSeconds(25 * 60);
    } else {
      const currentPhaseIndex = phases.findIndex((p) => p.name === phase);
      const nextPhaseIndex = (currentPhaseIndex + 1) % phases.length;
      const nextPhase = phases[nextPhaseIndex];

      setPhase(nextPhase.name);
      setSeconds(nextPhase.duration);
    }
    setIsRunning(false);
    onReset(); // Call the onReset function passed from the parent component
  };

  return (
    <View style={styles.container}>
      <View style={styles.circle}>
        <Text style={styles.timerText}>{formatTime(seconds)}</Text>
        <Text style={styles.phaseText}>{phase}</Text>
    </View>
    <View style={styles.buttonContainer}>
      <TouchableOpacity
        style={[styles.button, isRunning ? styles.stopButtonRed : styles.startButtonGreen]}
        onPress={handleStartStop}
      >
        <Text style={styles.buttonText}>{isRunning ? 'Stop' : 'Start'}</Text>
      </TouchableOpacity>
      <TouchableOpacity style={styles.button} onPress={handleReset}>
        <Text style={styles.buttonText}>Reset</Text>
      </TouchableOpacity>
      <TouchableOpacity style={styles.button} onPress={handleNextPhase}>
        <Text style={styles.buttonText}>
           {phase === 'Restart' ? 'Restart ' : 'Next Phase'}
        </Text>
      </TouchableOpacity>
    </View>
  </View>
 );
};

const styles = StyleSheet.create({
  container: {
    flex: 1,
    justifyContent: 'center',
    alignItems: 'center',
  },
  circle: {
    width: 200,
    height: 200,
    borderRadius: 100,
    borderWidth: 10,
    borderColor: 'red',
    justifyContent: 'center',
    alignItems: 'center',
  },
  timerText: {
    fontSize: 60,
    fontWeight: 'bold',
    textAlign: 'center',
  },
  phaseText: {
    fontSize: 24,
    fontWeight: 'bold',
    textAlign: 'center',
    marginTop: 8,
    color: 'gray',
  },
  buttonContainer: {
    marginTop: 20,
  },
  button: {
    backgroundColor: 'black',
    paddingVertical: 10,
    paddingHorizontal: 20,
    borderRadius: 5,
    marginBottom: 10,
  },
  buttonText: {
    fontSize: 16,
    textAlign: 'center',
    color: 'white',
  },
  startButtonGreen: {
    backgroundColor: 'green',
  },
  stopButtonRed: {
    backgroundColor: 'red',
  },
});

export default Timer;
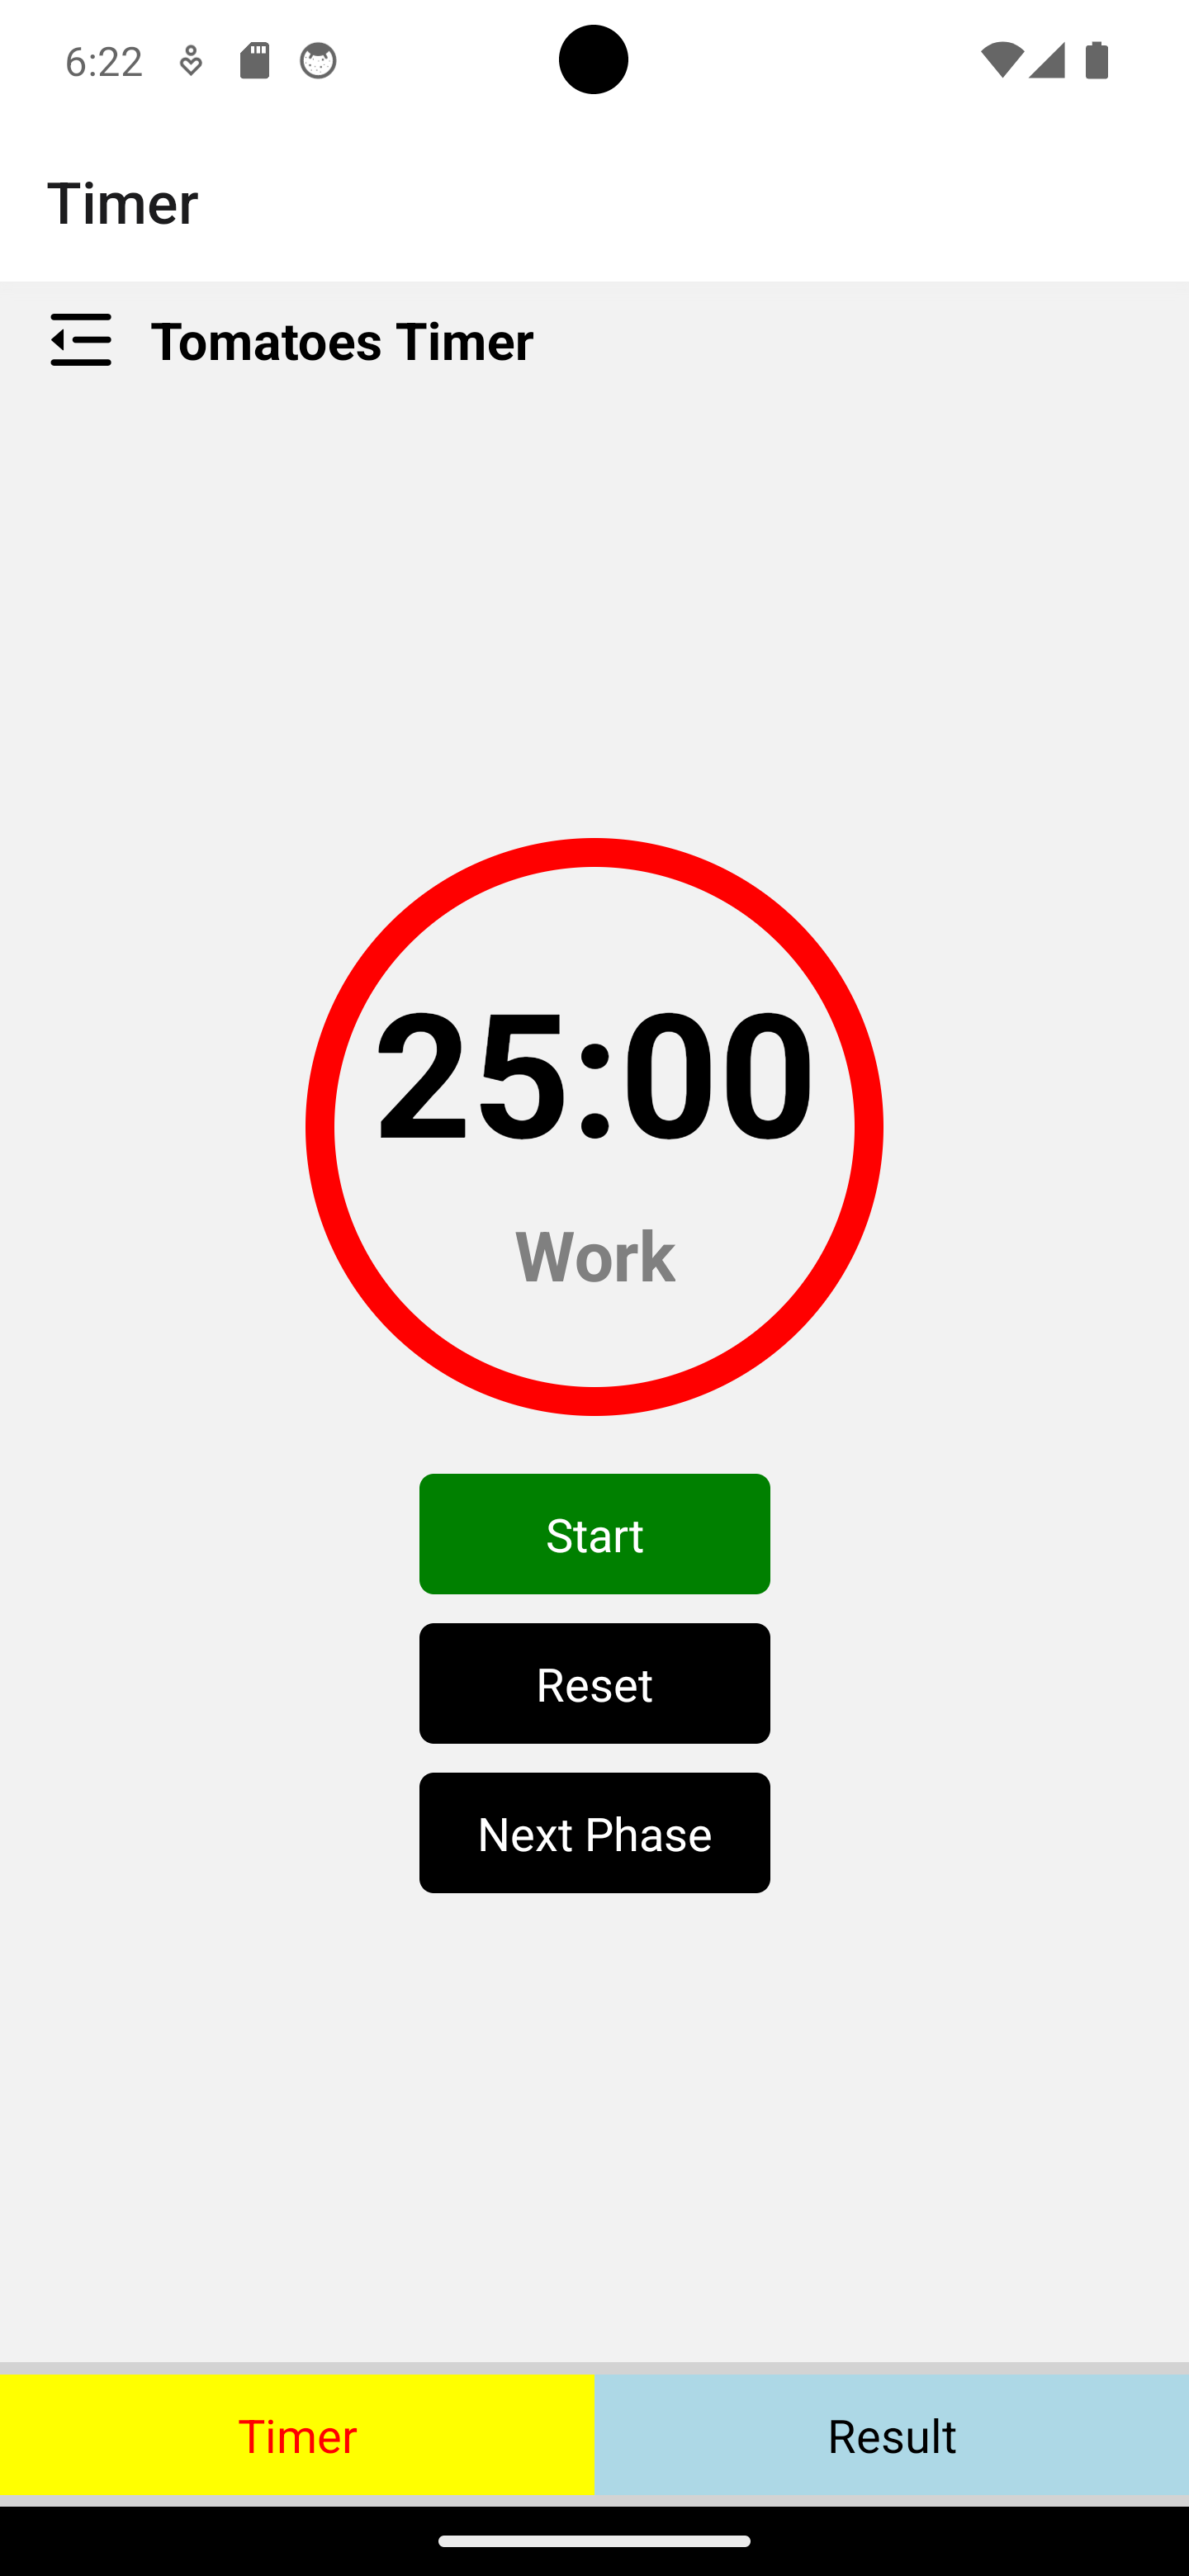
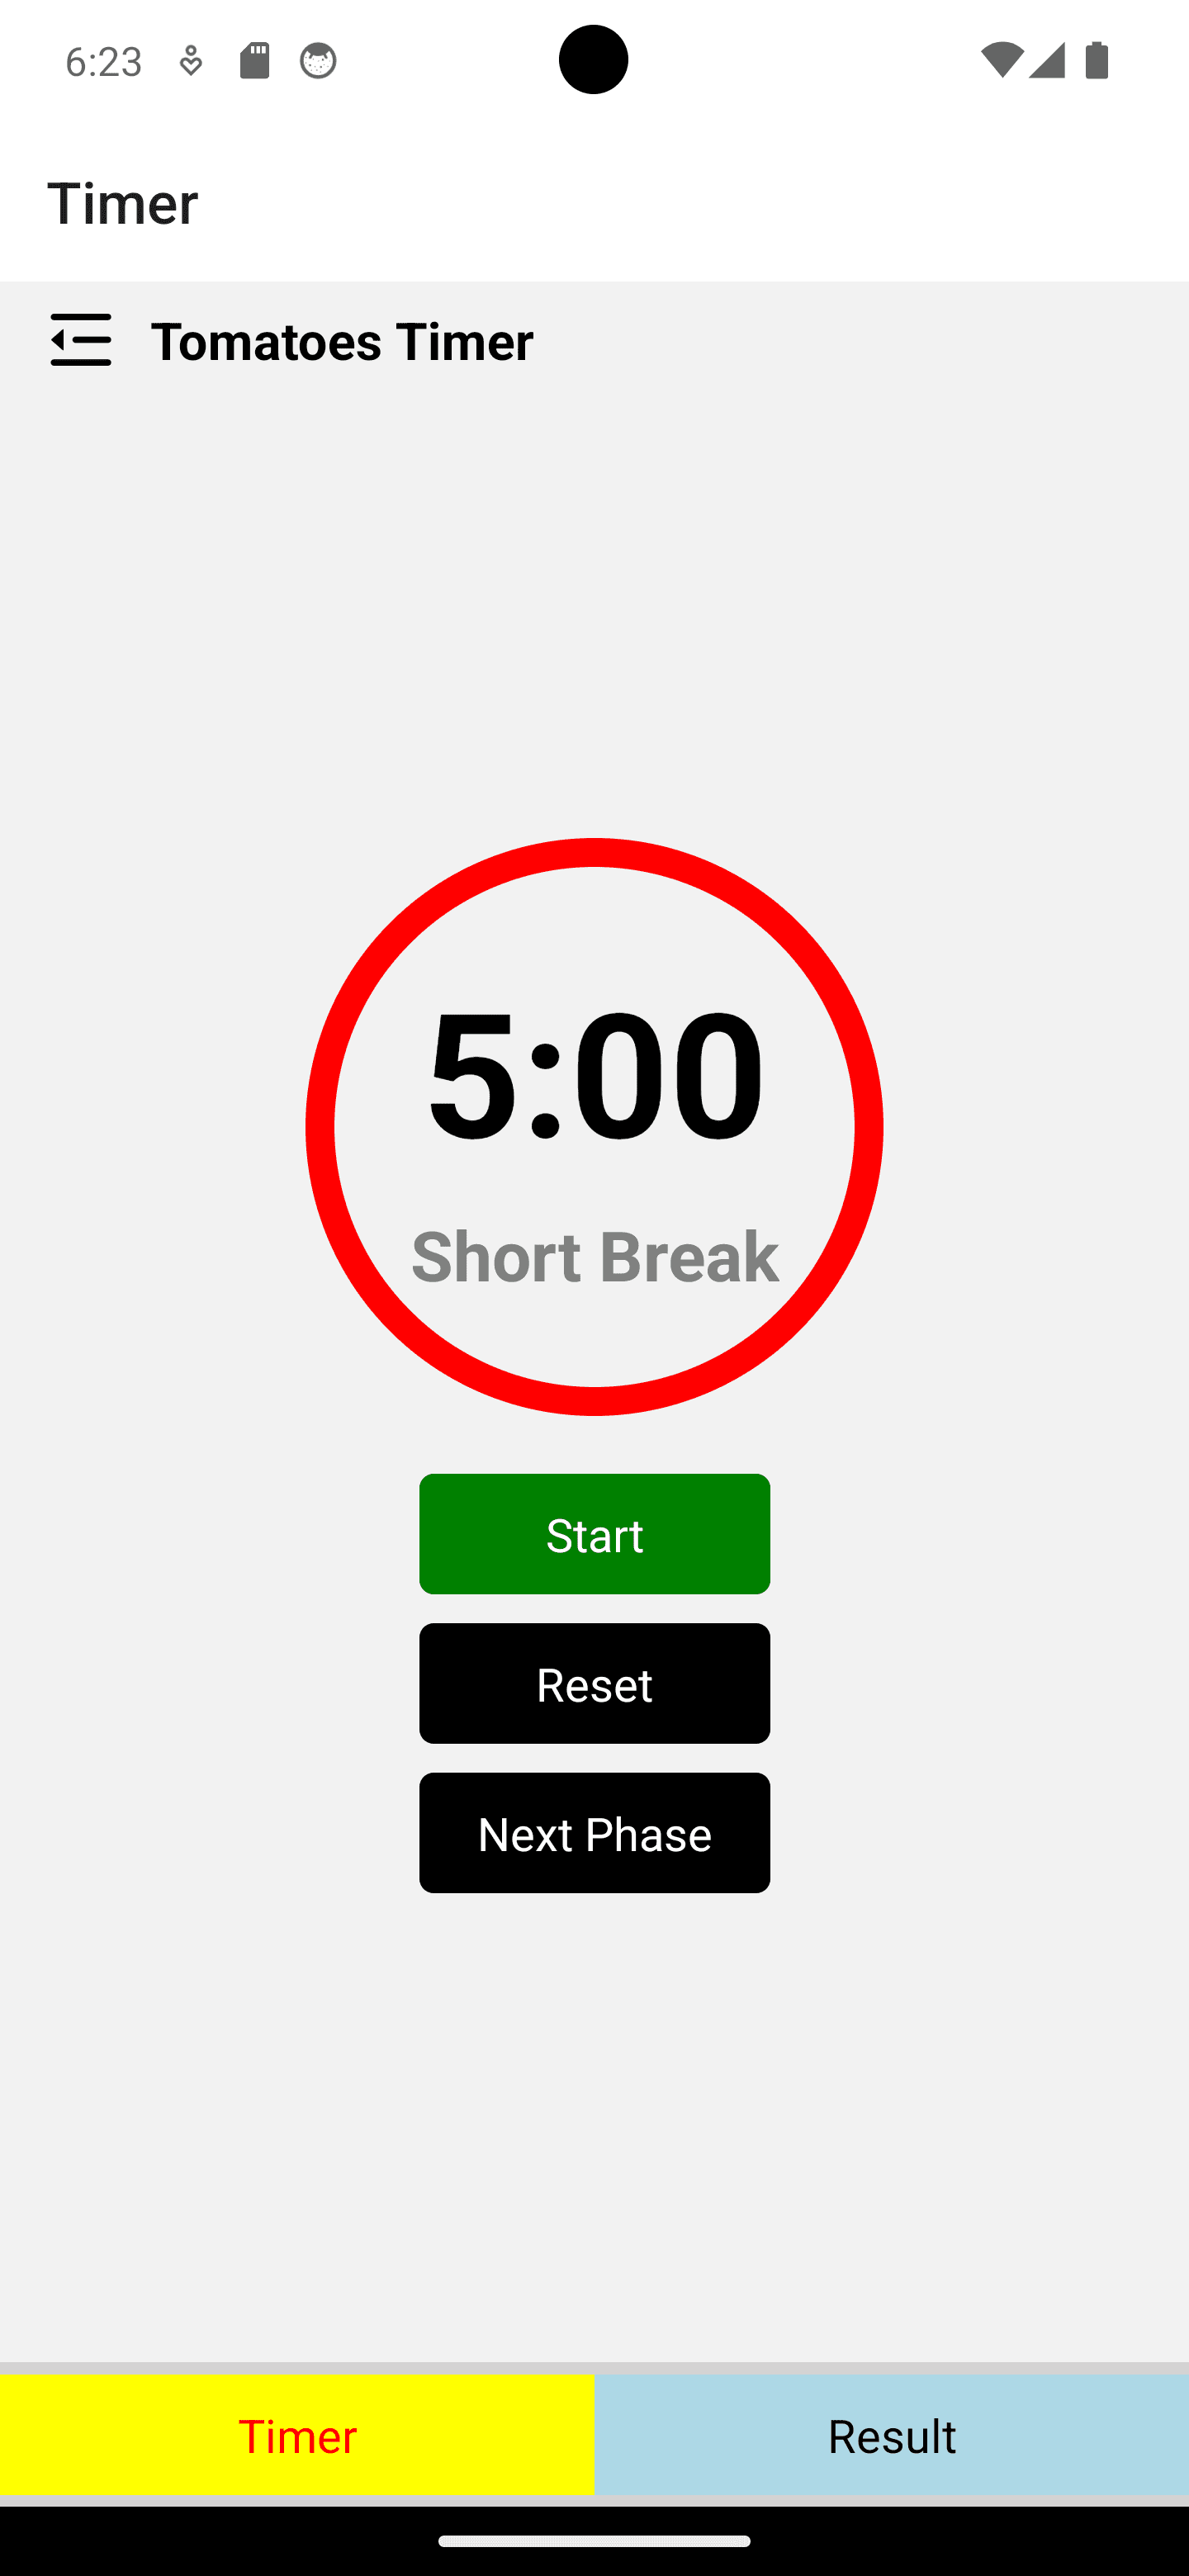
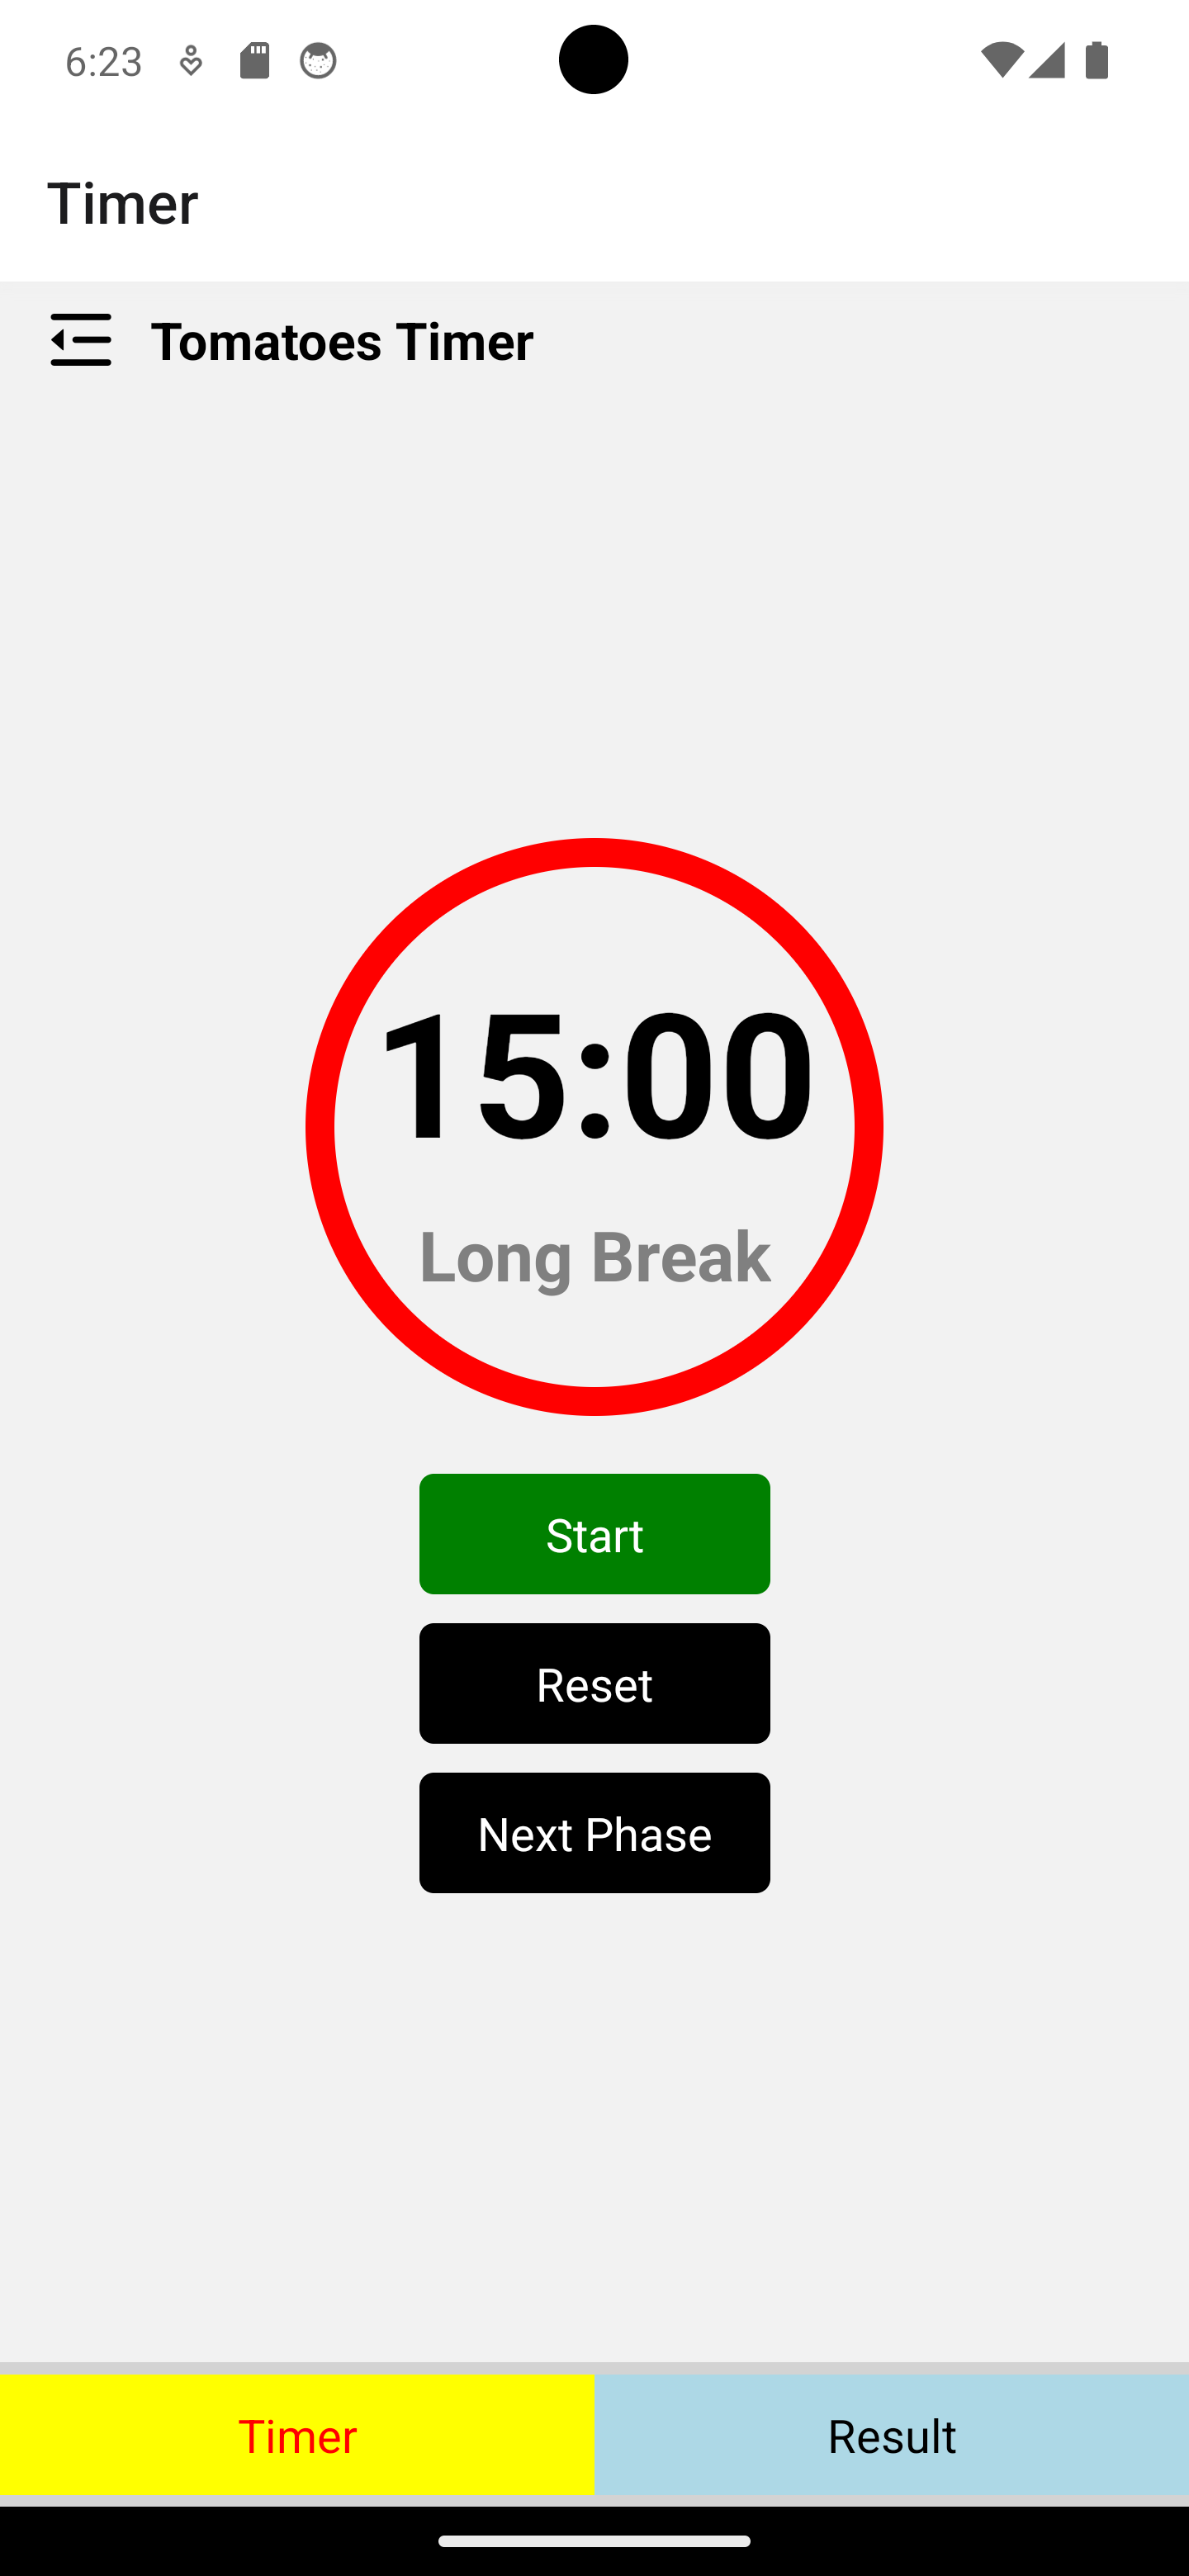
เมื่อเราทำการ Run ทดสอบก็จะได้รูปแบบนี้เลย Circle Timer ของเรามีการแบ่งเป็น 3 Phase เรียบร้อยแล้ว


Circle Timer ของเราก็จะมีการทำงานที่หลากหลายขึ้นแล้วและในบทความต่อไปจะเป็นเรื่องอะไรก็อย่าลืมรออ่านกันนะครับ
สุดท้ายนี้ถ้าเพื่อน ๆ ชื่นชอบบทความนี้และคิดว่าเป็นประโยชน์ก็อย่าลืมกด ❤ ให้กันเพื่อที่จะได้ไม่พลาดความรู้ใหม่ ๆ ที่ส่งตรงถึงที่ให้กันแบบฟรี ๆ ไปเลย และในตอนนี้ผมก็ต้องขอตัวลาไปก่อน…
ขอบคุณที่เข้ามาอ่านกันนะครับ🙏
.
🦖 borntoDev – สร้างการเรียนรู้ที่ดี สำหรับสายไอทีในทุกวัน

แนะนำสำหรับคุณ
เราใช้คุกกี้เพื่อพัฒนาประสิทธิภาพ และประสบการณ์ที่ดีในการใช้เว็บไซต์ของคุณ คุณสามารถศึกษารายละเอียดได้ที่ นโยบายความเป็นส่วนตัว และสามารถจัดการความเป็นส่วนตัวเองได้ของคุณได้เองโดยคลิกที่ ตั้งค่า