import React, { useState } from 'react';
import { View, TouchableOpacity, Text, StyleSheet, Modal, TouchableWithoutFeedback, TouchableHighlight } from 'react-native';
import { AntDesign } from '@expo/vector-icons';
const AppBar = () => {
  const [showMenu, setShowMenu] = useState(false);

  const handleMenuToggle = () => {
    setShowMenu(!showMenu);
  };

  const handleMenuClose = () => {
    setShowMenu(false);
  };
return (
<View style={styles.container}>
<TouchableOpacity onPress={handleMenuToggle} style={styles.iconContainer}>
<AntDesign name={showMenu ? 'menu-fold' : 'menu-unfold'} size={24} color="black" />
</TouchableOpacity>
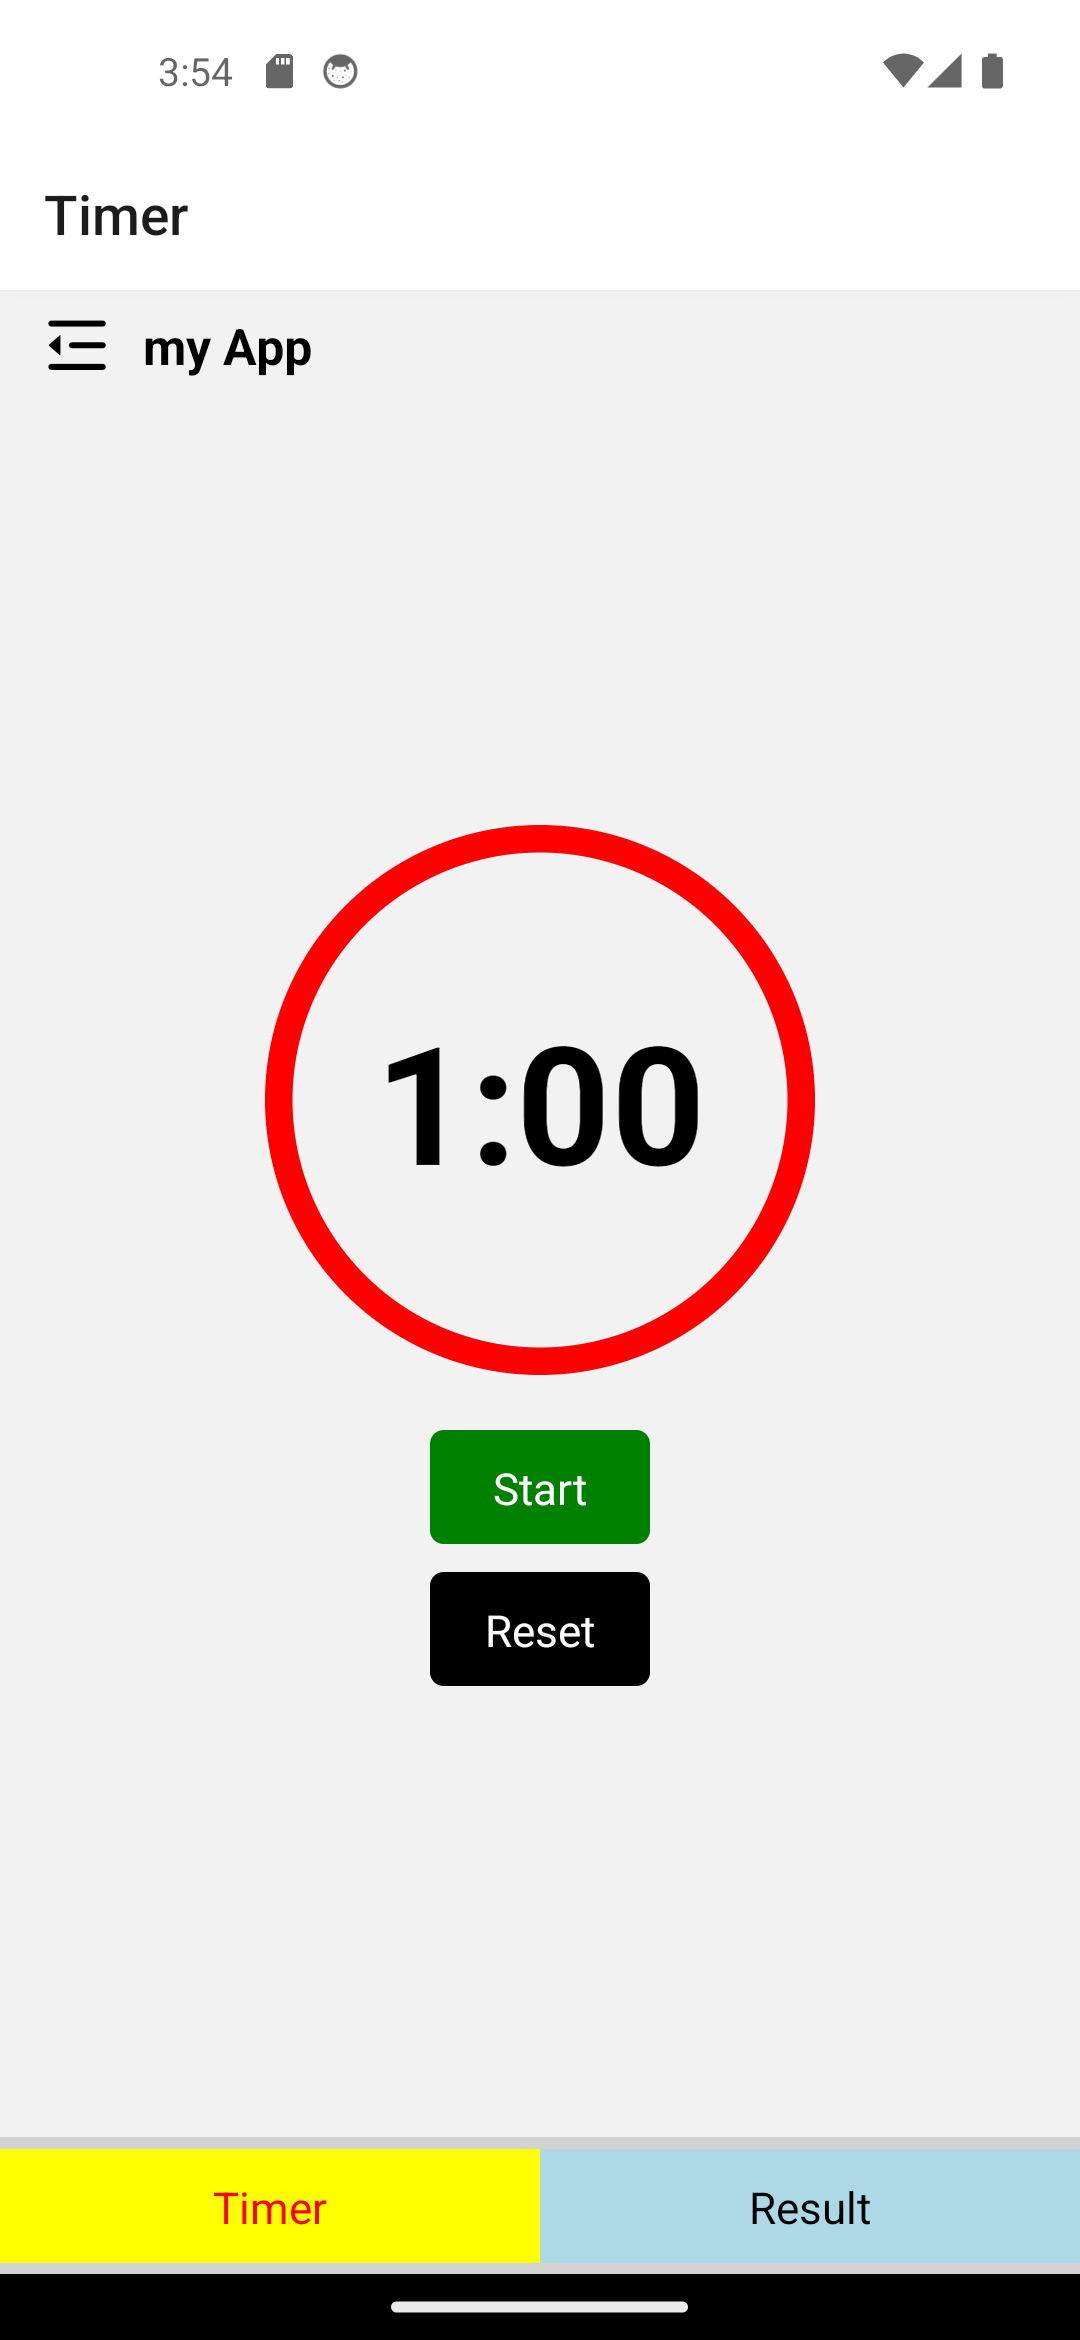
<Text style={styles.appTitle}>my App</Text>
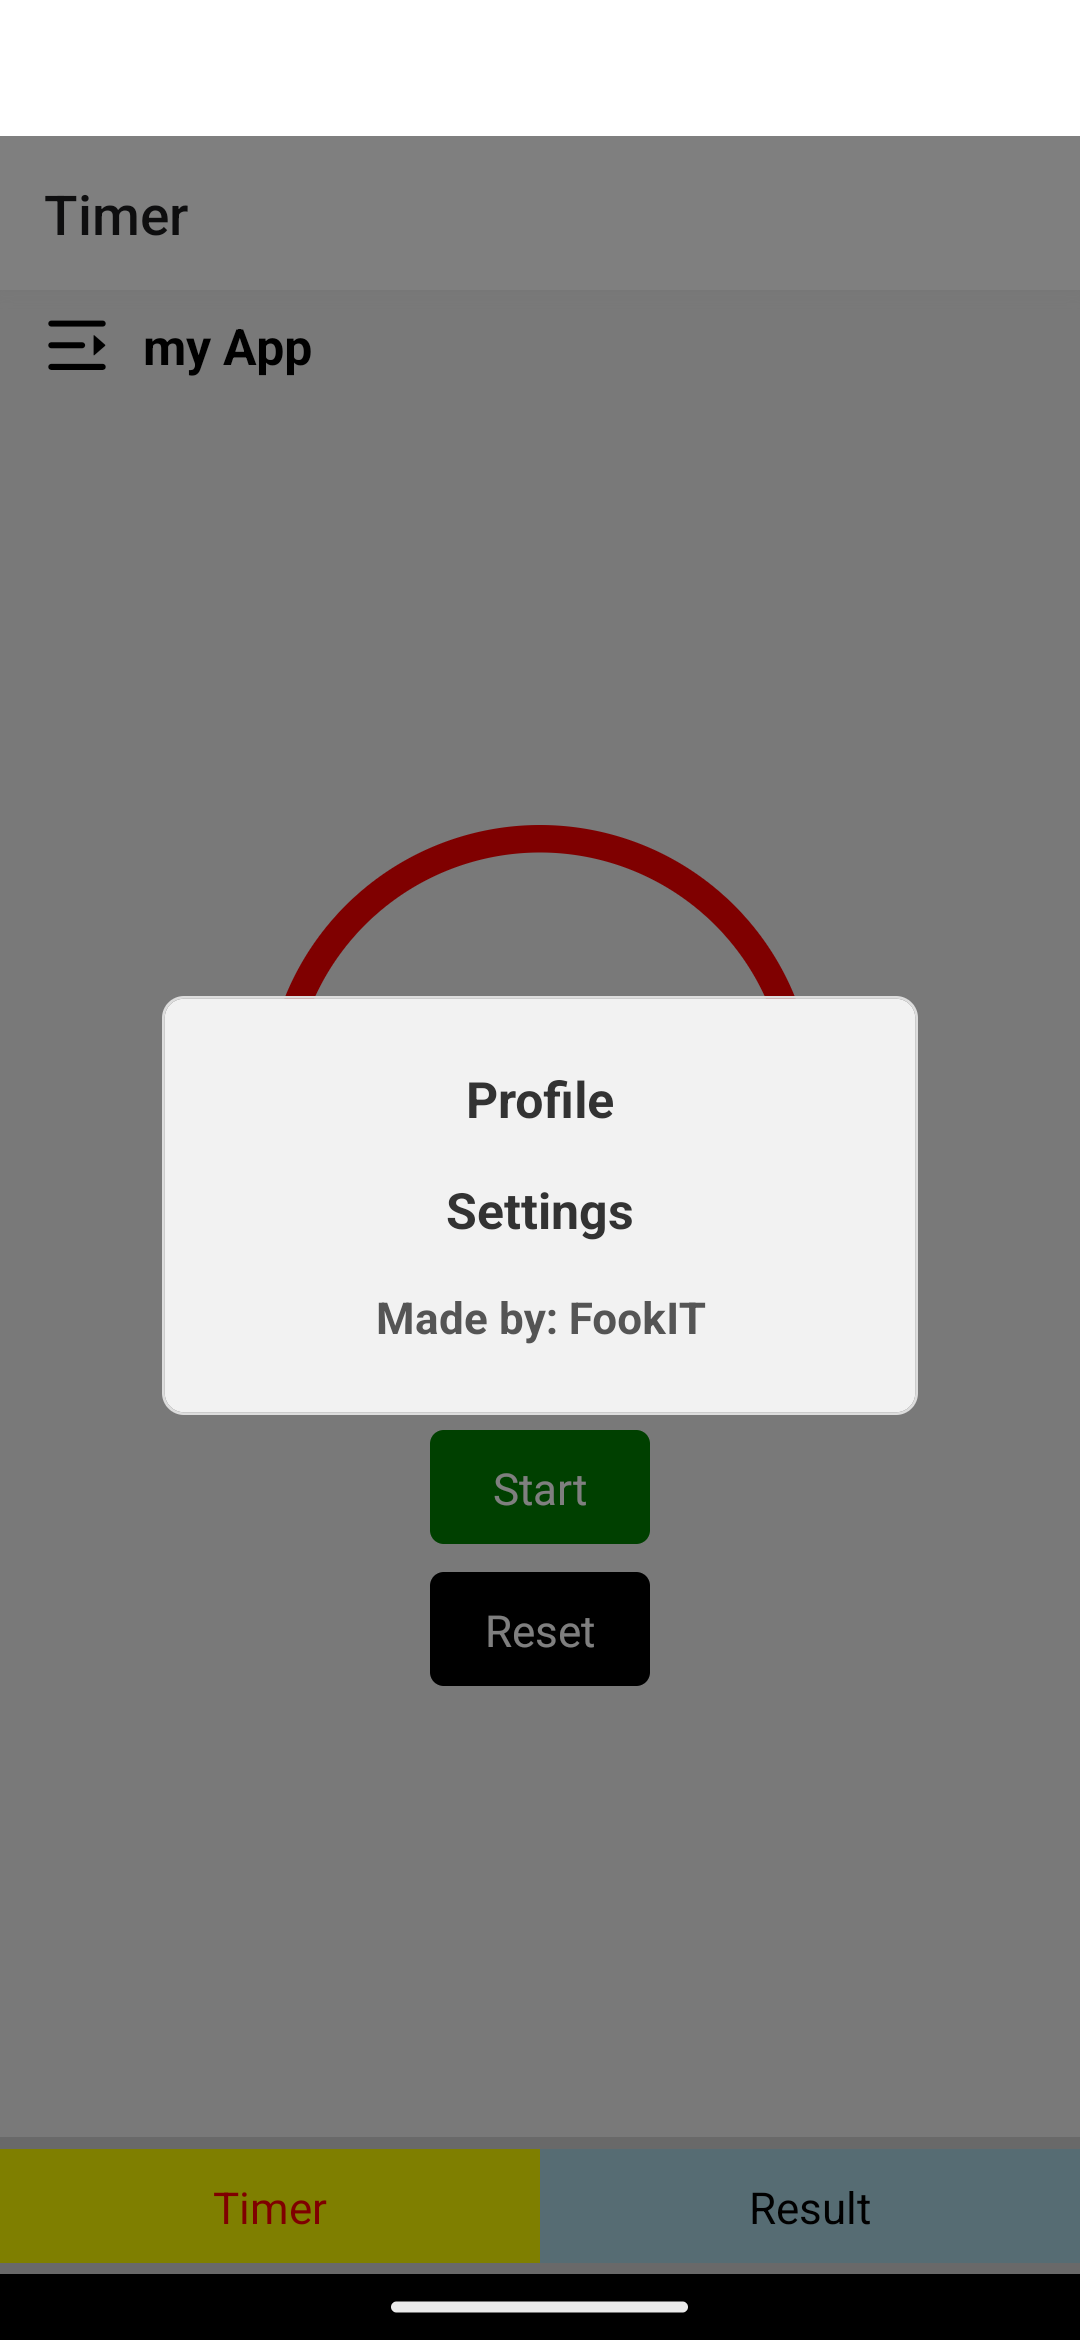
<Modal
visible={showMenu}
transparent
animationType="fade"
onRequestClose={handleMenuClose}
>
<TouchableWithoutFeedback onPress={handleMenuClose}>
<View style={styles.modalBackground}>
<View style={styles.menuItemsContainer}>
<TouchableHighlight
onPress={() => {
console.log('Profile clicked');
handleMenuClose();
}}
>
<Text style={styles.menuItem}>Profile</Text>
</TouchableHighlight>
<TouchableHighlight
onPress={() => {
console.log('Settings clicked');
handleMenuClose();
}}
>
<Text style={styles.menuItem}>Settings</Text>
</TouchableHighlight>
<Text style={styles.creditText}>Made by: FookIT</Text>
</View>
</View>
</TouchableWithoutFeedback>
</Modal>
</View>
);
};
const styles = StyleSheet.create({
container: {
flexDirection: 'row',
alignItems: 'center',
backgroundColor: '#f2f2f2',
paddingVertical: 8,
paddingHorizontal: 16,
},
iconContainer: {
marginRight: 12,
},
appTitle: {
flex: 1,
fontSize: 18,
fontWeight: 'bold',
},
modalBackground: {
flex: 1,
backgroundColor: 'rgba(0, 0, 0, 0.5)',
justifyContent: 'center',
alignItems: 'center',
},
menuItemsContainer: {
backgroundColor: '#f2f2f2',
borderRadius: 8,
borderWidth: 1,
borderColor: '#ddd',
padding: 16,
width: '70%',
},
menuItem: {
paddingVertical: 8,
fontSize: 18,
fontWeight: 'bold',
textAlign: 'center',
color: '#333',
},
creditText: {
paddingVertical: 8,
fontSize: 16,
fontWeight: 'bold',
textAlign: 'center',
color: '#555', // Use a different color for the credit text
},
});
export default AppBar;


 เขียนโดย